Sunday, July 31, 2011
Such support!
So, unfortunately, G fell this morning and long story short, he will be fine but is in surgery right now for a fractured tibia. And, I am patiently (or not so patiently waiting to hear how he is doing). He will be in the hospital until at least, Tuesday evening and not unble to put any pressure on his leg for two to three months, poor guy! (no staying in front of the waffle maker for awhile...). I am very thankful that he is going to be fine, just scary to have him in surgery. My sweet SIL, A, and her boyfriend, K (and my MIL is helping fund) are being so sweet, my SIL is already meal-planning gluten-free, vegetarian meals for us for the week. She just called and let me know that she is already well into the planning. We are having risotto, curry, pizza, and more. (As well as my sweet parents are watching the girls today and friend, M, for sitting with me in the waiting room). Thank you all for such wonderful support, I couldn't ask for more caring family and friends. Love you all!
Saturday, July 30, 2011
Belgian Waffles
I have made these waffles a few times and I think they are better than most 'regular' waffle recipes. The last time I made them, I quadrupled the recipe and made a TON (and I do mean a TON) to put in the freezer for quick breakfasts. It is pretty funny to see a huge vat of waffle batter in an extra large bowl. G operated the waffle maker and he was great; it did take a extremely long time to make that many waffles. However, it was well worth it! We had delicious, homemade waffles whenever we liked. All we did was thaw as many pieces as we needed and toasted them for one cycle on a fairly low toaster setting. I admit, I love them with fresh strawberries and a little homemade whipped cream, it is wonderful!
Easy Homemade Belgian Waffles
from Simply Sugar and Gluten-free p. 17
1 1/2 cups Basic Flour Blend (will reference below)
2 tablespoons palm sugar (I use Big Tree Farms Sweet Tree Organic Coconut Palm Sugar)
2 teaspoons gluten-free baking powder
1/4 teaspoon kosher salt
1 1/4 cups low-fat milk (I use rice milk)
2 large eggs, separated
3 tablespoons unsalted butter, melted and cooled (I have used salted butter)
1 teaspoon vanilla extract
Maple Berry Syrup (optional, p. 19 - will reference below)
1. Preheat a waffle iron on medium-high heat.
2. In a large bowl, whisk together the flour blend, palm sugar, baking powder, and salt. In a medium bowl, whisk together the milk, egg yolks, melted butter, and vanilla. Add the wet ingredients to the dry ingredients and whisk until smooth.
3. In another medium bowl, whisk the egg whites to soft peaks. Stir one-fourth of the egg whites directly into the batter, then fold in the remaining whites.
4. Lightly mist the waffle iron with cooking spray (I use butter and whip off the excess). Add the appropriate amount of batter for your waffle iron and cook until golden brown and crispy. To keep the waffles warm, place them on a wire cooling rack set on a large baking sheet in a 200 degree oven. This keeps the waffles from getting soggy by sitting directly on a baking sheet. Serve with syrup, if using.
My notes:
- If you make a large batch of waffles, we spread the extra waffles out to cool completely before freezing them.
- Most gluten-free cookbooks use their own special gluten-free flour blend. I have mixed this flour blend and haven't used it for many other recipes yet, I am looking forward to trying it with some of her muffin recipes.
- I use the coconut palm sugar in the recipe in place of refined sugar in quite a lot of cooking/baking and even in my coffee, it works great!
Basic Flour Blend
from Simply Sugar and Gluten-free p. 212
4 cups garbanzo-fava bean flour
4 cups sorghum flour
2 cups potato starch
1 1/3 cups tapioca starch
Mix well and store in an airtight container, preferably in the refrigerator.
Maple Berry Syrup
from Simply Sugar and Gluten-free p. 19
1 cup frozen mixed berries, thawed (or I have used fresh berries)
1 large ripe banana
1/4 cup unsweetened applesauce
1 to 2 tablespoons grade-B maple syrup
pinch of cinnamon (I leave this out)
pinch of salt
1. Puree the berries in a mini-food chopper (or blender) or a food processor fitted with the steel blade. Push the puree through a fine-mesh strainer to remove the seeds (I skip this part because I like the texture). Return the puree to the food chopper (blender) or food processor, add the banana, and puree unitl smooth. Add the applesauce, 1 tablespoon make syrup, cinnamon, and salt. Mix until smooth. Taste and add more maple syrup if desired (I use only one tablespoon because I like the fruit flavor).
2. Transfer the syrup to a microwave-safe bowl or serving dish and heat unitl warm. Serve immediately.
ENJOY!!!
Friday, July 29, 2011
Pad Thai
This is one of our favorite meals right now. I have made this recipe twice and we all love it! It is even better the next day as leftovers. A and C can't get enough of it. Therefore, I usually double the recipe.
Pad Thai
from Artisanal Gluten-free Cooking p. 155
2 tablespoons tamari wheat-free soy sauce
2 tablespoons water
2 tablespoons brown sugar (I am going away from refined sugar so have been usually coconut palm sugar)
2 tablespoons peanut butter (C doesn't eat peanut butter yet so I use sunflower butter, which I prefer much more than peanut butter in anything that calls for peanut butter)
2 tablespoons rice vinegar
2 teaspoons ground chili paste (my favorite brand is Thai Kitchen)
8 ounces of wide rice noodles (my favorite brand is Tinkyada Brown Rice Fettucini)
Olive oil
2 garlic cloves, minced
2 teaspoons minched fresh ginger
2 skinless chicken breasts (I use firm tofu instead)
1 egg
1/2 cup bean sprouts (I leave this ingredient out and add a TON of organic veggies - I add chopped red pepper, green pepper, onion, mushrooms, celery, carrots, squash, zucchini - anything you like)
1/4 bunch fresh cilantro leaves (I tend to use more)
1/4 cup peanuts, crushed
1 lime, quartered
Directions:
1. Whisk together the soy sauce, water, sugar, peanut butter (or sunflower butter), rice vinegar, and chili paste in a small bowl and set aside. The peanut butter will not mix in completely.
2. Place the raw rice nooldes in a bowl and pour very hot water over them. Let them soak for 15 minutes, until al dente. Drain well. (If you use the Tinkyada brand, you can boil them on the stovetop for about 14 minutes on medium-high heat and then drain and run cold water over them).
3. Heat about 1 heavy tablespoon of olive oil in a large skillet or wok over medium-high heat. Add the garlic and ginger and saute until fragrant, about 30 seconds. Add the chicken (or tofu) and cook, stirring, until cooked through. Remove the chicken (or tofu) from the pan and set aside.
(I then add this step in the recipe, which is not listed in the cookbook - add a little more oil (you don't need much or they become too oily) and saute the veggies. The more firm veggies should go in first and saute for longer and you can add softer veggies as the first veggies become somewhat soft. We use a ton so I usually saute them in two different batches in the wok).
4. Add a little more oil to the pan and cook the egg, stirring, for about 45 seconds. Add the cooked noodles and stir-fry for 30 seconds to separate the noodles. Add the sauce and chicken (or tofu and veggies), and cook for about 1 minute longer, until heated through.
5. Remove from the heat and stir in the bean sprouts (if you use them, we don't), cilantro, and peanuts. Toss. Squeeze one-quarter of the lime over each serving.
My notes:
- This is one of the newer cookbooks I ordered off Amazon. I do like the cookbook, but I tend to add a TON more veggies than the recipe calls for, I think that most recipes lack enough veggies for our tastes. I would even make the Pad Thai without Chicken or Tofu, just veggies.
- If you are pinched for time, you could buy a couple of bags of frozen organic veggies. We did this with first batch and it turned out great. We used 2 full bags and thought that it could still use a third bag of veggies next time.
- I always use the entire bag of Tinkyada Fettucini noodles (14 ounces) and again, a ton of veggies so I double the sauce, garlic, ginger, and use 2 eggs.
- I serve the cilantro leaves, peanuts, and lime separately (and have plenty of extra) so that we can all add these ingredients to our bowls as we would like (and C can skip the peanuts). This is my favorite part, the cilantro, peanuts and lime juice make it taste FANTASTIC! Also, A and C will just sit and eat cilantro leaves while they are waiting.
- If you haven't used rice noodles before, I think they are better than whole wheat noodles and I highly recommend the Tinkyada brand. We use the Tinkyada shells for Mac N Cheese...coming in an upcoming post.
- If you haven't tried Sunflower butter, try it! It is awesome, I never eat peanut butter and could eat sunflower butter plain, it's SOOO good.
ENJOY!!!
My next new thing...
We are now proud members of a CSA! What's that, you ask? It is an organic farm share or Community Supported Agriculture (CSA). You buy a share and then a farm delivers fresh produce to a nearby drop-off location. The produce is picked at it's peak of flavor and nutrition. Plus, it is delivered right to you (okay, close to you-not hundreds or thousands of miles away) and it isn't sitting around a grocery store for weeks before you are able to buy it.
I have been meaning to look into this for awhile. Then, G came home from work on Wednesday and mentioned that he was talking to a co-worker about it. I started doing some research that night. Additionally, a friend texted me last night and mentioned that she heard of a CSA that sounded good. I decided we needed to dive right in. As of this morning, we are now officially members of the Harmony Valley Farm CSA. We will be receiving a weekly delivery of veggies and a bi-weekly delivery of fruit at a near-by Bloomington drop-off location. We will receive our first box this coming Thursday, August 4th and I can't wait to start eating veggies straight off the farm! (And, post pictures!).
I have been meaning to look into this for awhile. Then, G came home from work on Wednesday and mentioned that he was talking to a co-worker about it. I started doing some research that night. Additionally, a friend texted me last night and mentioned that she heard of a CSA that sounded good. I decided we needed to dive right in. As of this morning, we are now officially members of the Harmony Valley Farm CSA. We will be receiving a weekly delivery of veggies and a bi-weekly delivery of fruit at a near-by Bloomington drop-off location. We will receive our first box this coming Thursday, August 4th and I can't wait to start eating veggies straight off the farm! (And, post pictures!).
A plate of juice

Here is our favorite recipes so far:
(will fill 3 large glasses)
- 2 large red apples (we use Braeburn), cut into chunks
- 1/2 of a small lemon
- 1 large cucumber seeded (I have read that cucumber seeds can make it taste slightly bitter
- 5 large Kale leaves
- 3 large stalks of celery
- 5-6 large carrots
Directions:
- wash all fruit and veggies, I have been using Biokleen produce wash.
- try on juicer and start add the ingredients (biggest step, make sure the cup is under the spout or you will have juice all over the counter and floor, I haven't done this yet, but I wouldn't put it past me).
- at the end, we add a small cup of water through the juicer to extract a little more from the ingredients.
- stir the juice, fill glasses with juice and ice, Enjoy!!!
Notes:
- I have read a few pieces of information so far that I have found helpful. It is recommended to drink the juice within 20 minutes of making it to retain as many vitamins and minerals as possible.
- From the recipes I have read, it is recommended to use organic produce when juicing, if possible.
- It is easiest to clean the machine right after using it.
Here is the final product. Very tasty!!!

Another favorite Amazon purchase
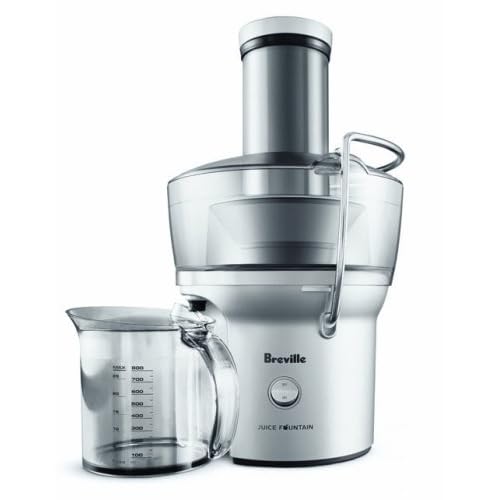
-picture from Amazon
We love it, it's such an easy way to eat (okay, drink) lots of fruits and vegetables. We have had it about a week and I have had a large serving of juice, at least once a day. I haven't played around with different recipes a ton yet, but am looking forward to mixing it up, literally. Other benefits are that it is super easy to use and clean.
Personal Shopper
...and she is awesome! So, back when I started our new eating habits in March, I began shopping around at different natural food stores in the Twin Cities. I tried The Wedge in Minneapolis, Valley Natural Foods in Burnsville, and Lakewinds Natural Foods in both Minnetonka and Chanhassen. They are all great, but my personal preference is Lakewinds in Chanhassen. C and I would go shopping during the day and admittedly, it would take FOREVER! I know it was take us quite a long time because of a few different reasons. One, I was shopping differently, buying more bulk items, different flours, C would be very helpful in helping pick out all the produce and two, because I was at a completely new store. Then, one day, Linda, was kind enough to mention her role at Lakewinds. She is the personal shopper for the store. Her job is to go through your shopping list you submit online, she checks you out, and keeps them in the store until you are ready to pick them up. All you have to do is call the store on your way there, you stop at the loading area, pick up your food, and you are done! It probably saves me 1 and 1/2 hours or more everytime I use this service. Have a mentioned how awesome it is? I LOVE IT!!! And, I highly recommend it!
Here's the details:
You do have to become a member of the Lakewinds Natural Foods. The membership is $90.00 for a lifetime subscription, you never have to renew. There is a number of peaks including that once a month, on a day of your choosing, you receive 5% off your total purchase (and it can be different each month, you just tell them the day you want to use it). We have had our membership since April and it has been well worth it.
You complete your shopping list online. If you complete your shopping list by 11:00 a.m., your items will be ready to be picked up anytime after 3:00 p.m.
If your order is over $75.00, the personal shopping service is free - which I think is really easy to spend over $75.00 at the grocery store. If it is under $75.00, it is a $5.00 fee.
Another benefit is that you can save your list each time and it will be there next time you want to shop. I will admit it took awhile the first time I used this option but by the second time, it was very quick.
That's it! You are done, all you have to do is call when you are 10 minutes away or so and they will have it ready for you when you pull up to the loading area.
Have I mentioned how much I love it yet?
Thursday, July 28, 2011
Rice Flour Pancakes and Apple Butter
So, we made Rice Flour pancakes the other day and we all love them. The most interesting note about the recipe is that my oldest, A, loves pancakes and waffles but always wants to drench them in maple syrup. However, she has had these pancakes for breakfast two days this week and eats them plain (with just a little bit of butter). I am pretty proud of her for enjoying the taste. I have to admit, that I made apple butter a few weeks ago and really enjoy topping the warm pancakes with cold apple butter, it's delicious (I will add that recipe below too). Here is the Rice Flour pancake recipe:
Rice Flour Pancakes
from The Whole Life Nutrition Cookbook p. 109
1 cup brown rice flour
1/4 cup tapioca flour
1 teaspoon baking powder
1/2 teaspoon baking soda
1/4 teaspoon xanthan gum
1/4 teaspoon sea salt
1 1/2 cups hemp, soy, almond, or rice milk
1 organic egg (note: they recommend using 1 heaping tablespoon of ground flax seeds whisked with 3 tablespoons boiling water to replace the 1 egg if needed in any baked recipe)
2 tablespoons melted virgin coconut oil or organic butter
1 tablespoon pure maple syrup or agave nectar
Directions:
1. In a medium bowl, mix the dry ingredients together. (You can place the dry mixture into a glass container and store in your pantry to have on hand for when you are pinched for time.)
2. Whisk the wet ingredients in a separate bowl. Add the wet ingredients to the dry and gently mix together.
3. Heat a 10-inch stainless steel skillet over medium heat. Add a little virgin coconut oil or organic butter for cooking. When the pan is hot, add about 1/2 cup batter. Cook for about 1 to 2 minutes or until the top begins to bubble, flip and cook for a minute or so more on the other side.
Variations:
- add 1 mashed banana to the batter for banana pancakes
- add 1 tablespoon lemon juice to the milk and fresh or frozen blueberries to the batter for blueberry 'buttermilk' pancakes
- add 1 grated apple and 1 teaspoon cinnamon to the batter for apple cinnamon pancakes
- replace half of the rice flour with amaranth flour for a more nutrient-dense pancake
My notes:
- I have tried soy and rice milk and both are great.
- I have also tried the egg-free tip and it turned out equally great.
- I also like to put the 1 tablespoon of lemon juice in for the taste; however, when I added the frozen blueberries, the batter became really thin and hard to work with so I will have to play around with it.
- I think the batter cooks very quickly (more quickly than the recipe states so I flip them when I see bubbles).
Slow Cooker Apple Butter
from Simply Sugar and Gluten-free p. 48
4 to 5 pounds apples, cored and sliced
1/2 to 1 cup unsweetened frozen apple juice concentrate, divided
1/2 teaspoon ground allspice
1/4 teaspoon ground cloves
1/4 teaspoon freshly grated nutmeg (I used ground nutmeg)
1 1/2 to 2 teaspoons ground cinnamon, divided
pinch of salt
Directions:
1. Place the apples in a large (5 to 6 quart) slow cooker. Melt 1/2 cup apple juice concentrate in the microwave or on the stovetop and pour over the apples. Sprinkle the apples with allspice, cloves, nutmeg, 1 1/2 teaspoons cinnamon, and the salt. Gently stir with a large wooden spoon. Place the lid on the slow cooker and cook on low for 8 to 10 hours or overnight.
2. Check the apples after 8 hours. If they need to be cooked longer, leave the slow cooker on. If the apples are soft, puree with an immersion blender while the apples are still in the slow cooker. Or you can transfer them to a food processor or blender and puree in small batches. Taste and adjust the seasoning, adding the remaining 1/2 c. apple juice concentrate and the 1/2 teaspoon cinnamon for sweetness, if desired. Continue to cook on low with the lid off until the apple butter is thick.
3. Store in glass jars in the refrigerator for two months, or freeze.
My notes:
- I used a huge bag of sliced, frozen apples that I received from a friend, from her parent's farm. I put them directly into the slow cooker and it worked perfectly.
- I cooked the apple butter for about 14-15 hours, uncovered for the last hour.
- I did not blend it, we enjoy serving it a little chunky.
- I also did not add the extra apple juice concentrate or cinnamon. In my opinion, it is the perfect amount of sweetness with just the first ingredients added in the beginning.
ENJOY!!!
My new favorite place to shop...
...is Amazon! I love this site. Back in March, when I decided to order a few nutrition books on amazon, I ended up signing up for a trial of amazon prime, where you receive free shipping on all your orders for a few weeks. Well, the rest is history.... after the trial, I enrolled in amazon prime for a year and have done quite a bit of shopping on the site. I love it and it's addictively easy. Every so often (and it's more often than I care to admit), I happen to start looking around because of another person's blog post and I end up with a new fun purchase that arrives at my doorstep in roughly two days for free (that is the shipping is free).
I have a number of favorite purchases so far, but the one I am probably using the most is my water bottle. I purchased the Takeya glass water bottle on another person's blog recommendation (and now I can't remeber where I saw it). I bought it because I felt like I never drank enough water. We are on the go so much that I need to have something along in the car. I didn't like using a ton of plastic water bottles because of the waste it creates. I tried aluminum bottles for awhile and got somewhat used to it but still never drank enough. So, I tried the Takeya bottle and absolutely love it! I take it where ever we go and now I drink a ton of water every day. I am very happy with my purchase. And, the pink one is just pretty to have along all the time.
I have a number of favorite purchases so far, but the one I am probably using the most is my water bottle. I purchased the Takeya glass water bottle on another person's blog recommendation (and now I can't remeber where I saw it). I bought it because I felt like I never drank enough water. We are on the go so much that I need to have something along in the car. I didn't like using a ton of plastic water bottles because of the waste it creates. I tried aluminum bottles for awhile and got somewhat used to it but still never drank enough. So, I tried the Takeya bottle and absolutely love it! I take it where ever we go and now I drink a ton of water every day. I am very happy with my purchase. And, the pink one is just pretty to have along all the time.
Monday, July 25, 2011
Lots of cooking=destoryed kitchen
Wow, it always amazes me how our kitchen looks after one meal, not to mention a full day of cooking. G was off work today so we enjoyed spending lots of time in the kitchen. Here is our list of what we accomplished in the kitchen (and possibly dirtying every dish we own)...
Rice Flour pancakes (from The Whole Life Nutrition Cookbook)
Not Just Any Old Hummus (from Simply Sugar and Gluten-free)
Mac and Cheese (also from Simply Sugar and Gluten-free)
Asian Lettuce Wraps (also from Simply Sugar and Gluten-free), this was with ground turkey since we are not strict vegetarians right now.
Oh, and I cooked a crock-pot soup for my parents.
On the positive side, we have lots of leftovers so the kitchen may not as destroyed tomorrow....
St. Paul Farmers' Market
This last Saturday, we all ventured out to the St. Paul Farmers' Market and we loved it! Farmers' Market's are one of those things that I have always loved in theory but haven't really made much time to go to before now. The girls and I went to the Bloomington farmers' market last summer once or twice but not any more than that. After Saturday, I am 'in love' with them. My goal is to go to one just about every weekend until the end of fall. I loved all the fresh produce and flowers, it really was beautiful. It was a very cold and rainy day so I did leave my camera at home, so I have no pictures of all our 'finds'.
My favorite purchase of the day was 3 enormous zucchini and squash that we bought for a total of $1.00. I kid you not, the zucchini was the size of my entire arm and the 2 yellow squash were about the size of my forearm! They were huge, delicious, you can't beat the price and they were all organic. The cost alone is enough to encourage me to go back to the farmers' market every week, not to mention that I can support local farmer's as well. Our other treasures that we found were raspberries, blueberries, colorful beans, cucumbers, and snap peas. This coming Saturday, we are off to the Bloomington farmers' market, I am going to try and beat my find of last weekend!
My favorite purchase of the day was 3 enormous zucchini and squash that we bought for a total of $1.00. I kid you not, the zucchini was the size of my entire arm and the 2 yellow squash were about the size of my forearm! They were huge, delicious, you can't beat the price and they were all organic. The cost alone is enough to encourage me to go back to the farmers' market every week, not to mention that I can support local farmer's as well. Our other treasures that we found were raspberries, blueberries, colorful beans, cucumbers, and snap peas. This coming Saturday, we are off to the Bloomington farmers' market, I am going to try and beat my find of last weekend!
Saturday, July 23, 2011
Smashed Yam and Pinto Bean Quesadillas
Smashed Yam and Pinto Bean Quesadillas
based on the recipe from The Whole Life Nutrition Cookbook p. 268
We made these quesadillas tonight and they were fantastic! It was very close to the recipe from this cookbook; however, I didn't have any more black beans so we used pinto beans. The girls and I had them on corn tortillas but my husband used brown rice tortillas and loved them. He said they were better than flour tortillas after they were browned. The filling was:
1 large yam, cooked and smashed into pieces
1 cup of cooked pinto beans (I sauteed them with cumin but would like to use more spices next time)
Grated organic cheese
I didn't reference the recipe until later and forgot that they recommended to use spinach as well. We have made this before using the spinach and it was delicious. I would highly recommend using the spinach as well. Another note is the yam is naturally sweet so we use only a small amount on each quesadilla. Pinto beans worked well as a substitute when necessary but I will try and make sure that I have cooked black beans next time I make these.
ENJOY!!!
Starting to cook...
Okay, so I was amazed I was starting a blog back in April. I was going to blog frequently (much more than once every three and a half months) and well, that didn't happen. So, let's try this again.
I was thinking today about how dramtically I have changed in my cooking skills. I started cooking and baking four and a half years ago after a trip to Maryland to visit my in-laws. I give full credit to becoming a cook to my mother-in-law and watching her make and bake such delicious homemade meals in her kitchen. Before that, my idea of a homemade dinner was a roast in the crockpot with maybe some potatoes or asking my husband to cook. So, I began cooking and amazingly, I enjoyed it. Somehow over the next four years, I began making more and more items from scratch and buying organic. Then, one day, my husband somewhat randomly decided that he would like to try becoming vegetarian. I enjoyed veggie pizzas, sandwiches, pasta dishes and more so we decided to try it together, most of the time. Admitedly, we are not at all strict vegetarian and were more so a few months back.
Around the time of becoming vegetarians, I had also tossed around the idea of going gluten-free. I didn't know much about it, but it seemed like there was some health benefits. I thought about it for a year without doing much with it. Then, this past March, I offered to bring a new mom a meal after her baby was born and she requested that it be gluten-free. I decided that it was time to make the plunge and so it began, my family and I were gluten-free. I was strict with myself from the beginning, but did 'cheat' when going out to dinner. I ordered a some nutrition books on amazon and began the journey. My favorite cookbook I ordered is, 'The Whole Life Nutrition Cookbook' by Alissa Segersten and Tom Malterre.
So, my reason for the blog, is to begin to remind myself of all the recipes I try and things that I learn on my journey of becoming gluten-free. Here goes to keeping a better track...
Subscribe to:
Posts (Atom)